

Years ago I fell in love with applique art. The ability to create anything I wanted AND make use of my ever-growing pile of scraps? Yes please! If you've ever wanted to try but don't know where to start, I'll be detailing my process for applique in this post.
Before we get started, it's important to note that I primarily work with knit fabric. This is important because
- knit fabric doesn't fray when cut, unlike woven fabric
- it will try to stretch on you when appliqueing if you don't have some sort of stabilizer.
So if you're looking to add a little bit of personalization to your favorite T-shirt or hoodie or your next sewing project, then this method will be perfect for you. So gather up all your supplies and let's get started!
Supplies needed:
- Base that you're sewing your applique on (T-shirt, Hoodie, or the pattern piece if you're sewing your own clothing)
- Heat-n-Bond - you can also buy the printable one here if you want to print your design(this will only work if you can print out the individual pieces of your applique, not the whole picture)
- Scissors(small and sharp, but not your best fabric scissors)
- Knit scraps in the colors you want
- Matching or Contrasting thread depending on the look you're going for
- Iron
- Sewing Machine

Alright, now that you have your supplies, the first thing you're going to want to do is draw out or print your applique design. Remember your final product is going to be flipped.

Next you're going to want to trace each individual piece onto your Heat-n-Bond. Make sure to not make your pieces too small since you'll eventually be sewing them on.

Cut a rough shape around the pieces and iron the bumpy side of the Heat-n-Bond onto the correct color scraps. Use a dry iron for about 3 seconds per piece.
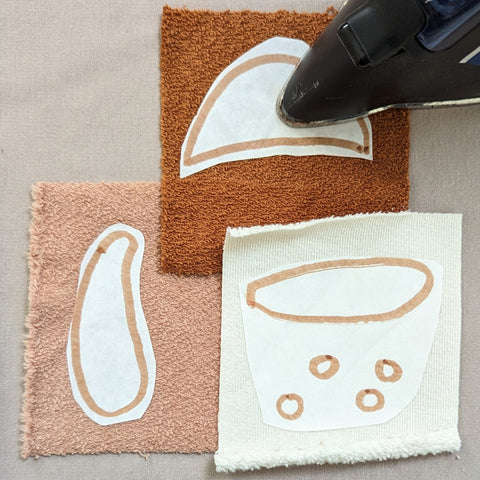
Then carefully cut out your pieces.

Nowpeel of the paper backing to the Heat-n-Bond and iron on the first piece in your design working from back to front(save the embellishments for last!)

When you sew, you're going to want to use a straight stitch that's a bit longer than usual but not too long that it makes the corners hard. On my machine, that's usually 2.8-3.2. Make sure you backstitch at the beginning and end of your stitch to lock it

Go slowly, and stay as close to the edge of your applique as possible while still catching the fabric. I usually try to stay slightly less than 1/8th inch from the edge.

Continue this process, layering on your applique until you've finished the applique. Now you can add any embroidery or other embellishments you'd like. You can draw on details with markers like these. Or embroider with thread like this.

And there you go! Now you can add applique to anything and everything you want.
Pin these to save this idea!


